Food Truck Trailer Vinyl Sign Decal Sticker - Indoor & Outdoor
Food Truck Trailer Vinyl Sign Decal Sticker - Indoor & Outdoor
Couldn't load pickup availability
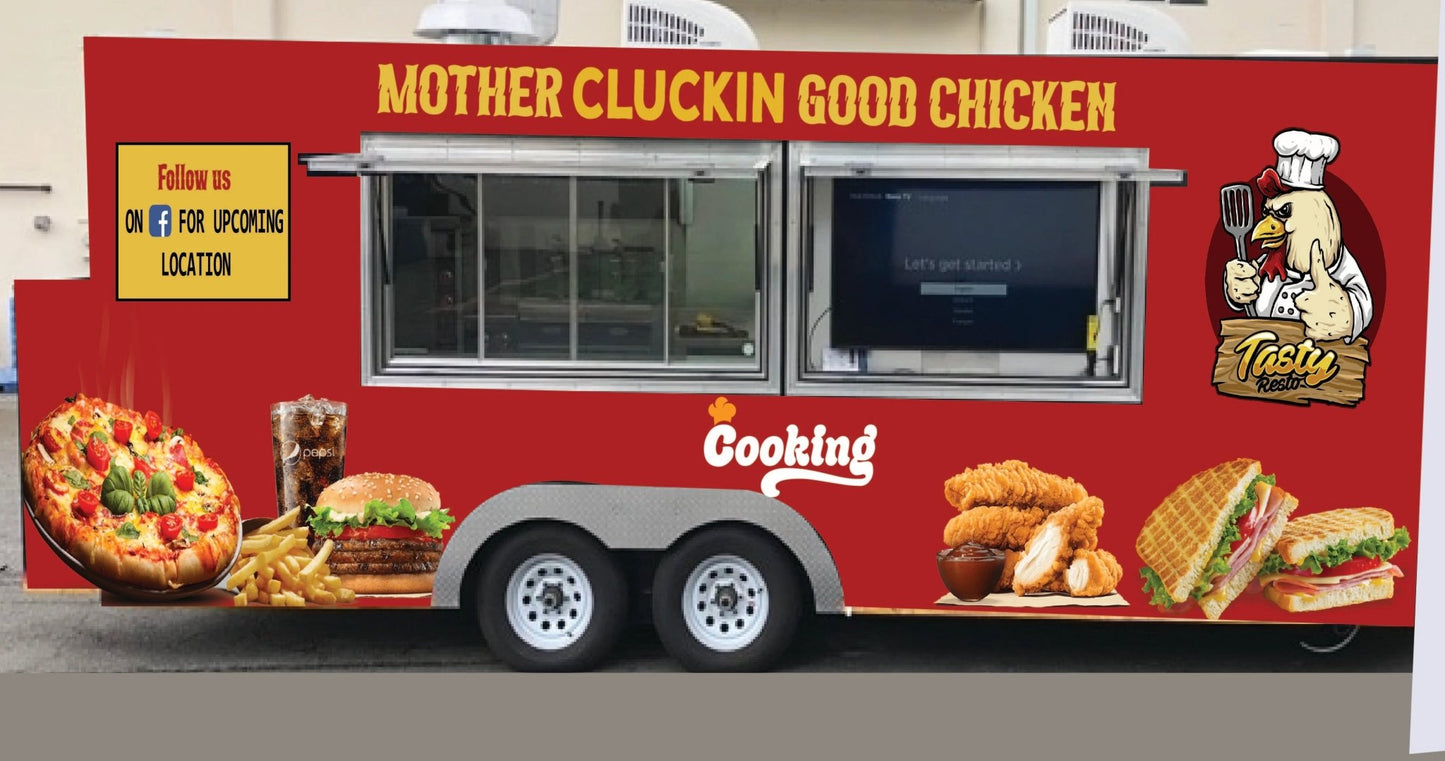
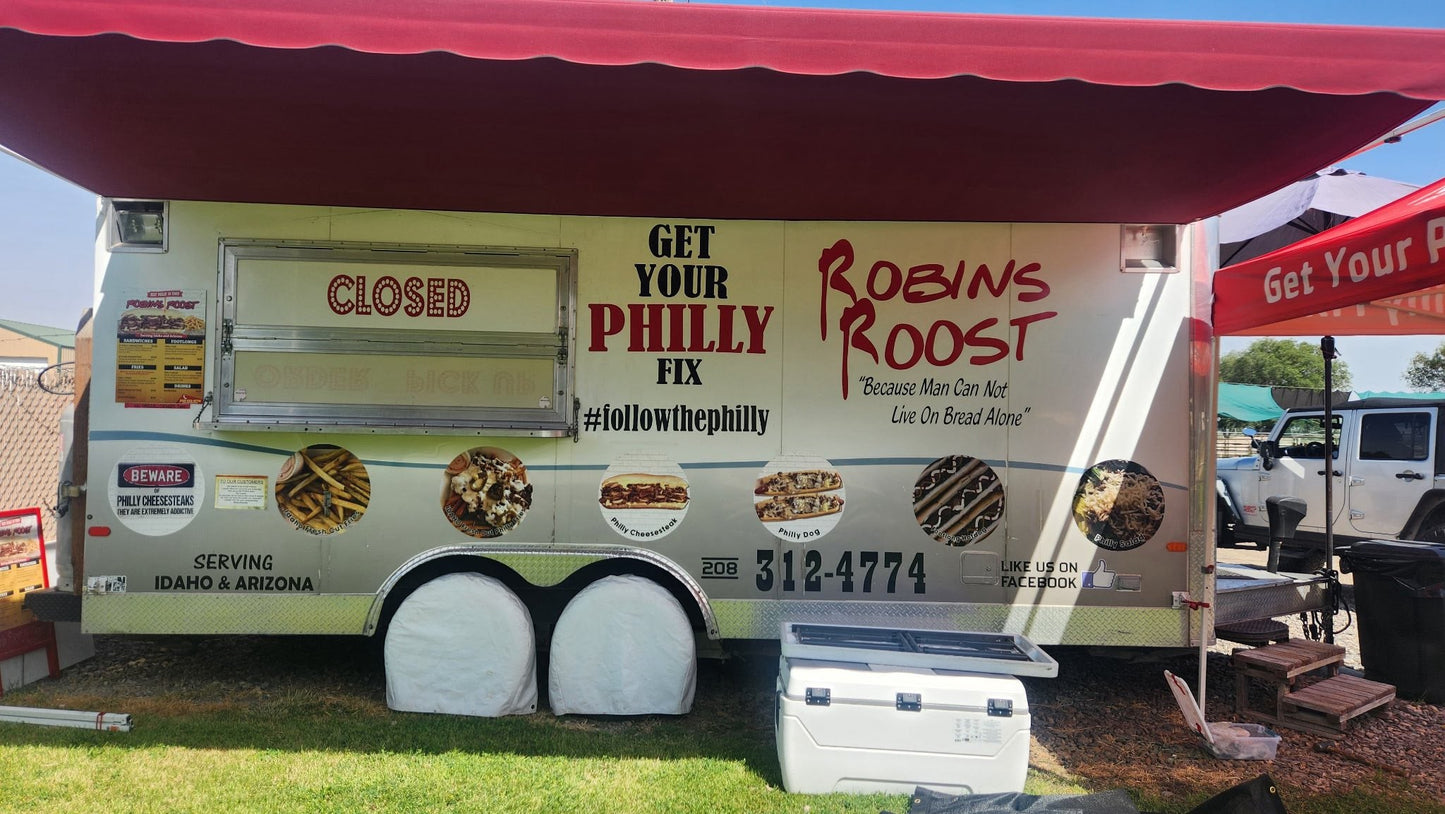
Custom Vinyl Sign Decals – Durable, Professional Branding for Food Trucks and Trailers
Looking for a bold, affordable way to brand your food truck or trailer? Our Custom Vinyl Sign Decals offer a durable, eye-catching solution designed specifically for mobile kitchens and the demands of life on the road.
Why Choose Our Custom Vinyl Sign Decals?
✅ Premium AutoMark Vinyl – Manufactured with industry-leading AutoMark Vinyl and backed by a 10-year warranty for durability and long-lasting performance on vehicles.
✅ Built for Food Trucks & Trailers – Engineered to withstand sun, rain, wind, and washing – ideal for the unique needs of mobile food service businesses.
✅ Easy Application – Designed for smooth application to metal, glass, and painted surfaces commonly found on food trucks and trailers.
✅ Custom Sizing – Precision-cut to fit your logo, message, or design with a clean, professional finish.
✅ Vibrant, High-Resolution UV Printing – Bold, full-color graphics make your brand stand out and attract attention wherever you serve.
Perfect for:
🚚 Exterior Branding – Apply logos, business names, or slogans to food truck and trailer sides for instant, recognizable branding.
🍔 Menu Boards & Service Windows – Label ordering areas, display menus, or highlight promotions right on your truck.
🎉 Event & Catering Signage – Add professional signage for festivals, markets, and private catering events.
Make your food truck or trailer impossible to miss with Custom Vinyl Sign Decals — a long-lasting, affordable solution that delivers professional results.
For custom decals contour cut to shape, or custom sizing, please submit a quote request.
Easy "how to" instructions for installing vinyl signage decals on a food truck or trailer:
Vinyl Decal Installation Methods: Dry & Wet Install
Tools - Dry Install
These are the tools you will need for dry installation:
Light cleaning solution, we recommend warm soapy water.
Paper Towels
Masking tape
Scissors
Tape Measure
Squeegee, credit card or small, flat, hard-edged object.
How To Install a Vinyl Decal - Dry Install
Step One: Clean & Dry Surface
Clean the intended surface with a light cleaning agent, like warm soapy water or rubbing alcohol. Using an absorbent paper towel, dry off the surface, and be sure not to leaveany paper bits behind.
Step Two: Tape Decal to Surface
Next, grab your masking tape and use it as a temporary adhesive to hold the decal in place.
Step Three: Level & Measure Decal
Once you have the decal secured to the intended surface, using a line of text as a place to measure from, level off the decal.
Step Four: Peel & Cut Bottom Half of Backing
Peel back and cut off the bottom half of the decal backing.
Step Five: Apply Decal to the Surface
Using your squeegee, or similar object, press and apply the decal to the intended
surface beginning on one side and working your way in a zig-zag pattern to the other side of the decal. Take your time working your way across the decal, otherwise air bubbles can occur.
Step Six: Remove the Tape
Once the decal is smooth and bubble free on the surface, gently remove the masking
tape.
Step Seven: Peel & Remove Top Half of Backing. Carefully peel off the top half of the decal backing.
Step Eight: Press and Apply
Using your squeegee or similar flat edged object, press and use pressure to slowly
apply the decal to the surface with the same zig-zag motion as before. Take your time to avoid air bubbles.
Tools - Wet Install
These are the tools you will need for wet installation:
Light cleaning solution, we recommend warm soapy water.
Paper Towels or dry cloth
Squeegee, credit card or small, flat, hard-edged object.
How To Install a Vinyl Decal - Wet Install
Step One: Clean the Surface
Use a light household cleaning agent, like warm soapy water or rubbing alcohol to
thoroughly clean the surface. Clear away any cleaner residue or debris with a dry cloth. Debris can weaken the adhesive, so make triple sure you don’t have any clinging to your surface.
Step Two: Spray & Apply Decal
Prior to peeling away the decal backing, spray the surface with light soapy water or
glass cleaner.
Step Three: Squeegee out the Liquid
Use a squeegee, or small, flat, hard edged object, to squeeze out any excess moisture. The best way to do this is to start in the middle of the decal and move toward the outer edges, using the squeegee tool to work out the liquid from behind the decal.
Step Four: Wipe Away Liquid & Dry Surface
Wipe away the liquid from around the decal and make sure the surface is dry.